

Free Internet Access!
You may or may not have heard about the free, no catches Internet
service provided by Dixons called "Freeserve". Since it's conception, it
has been exclusively intended for PC owners. However, it is still
possible for Amiga people to sign up and enjoy the benefits. If you
don't have an Internet connection of your own, there's never been
a better time to venture onto the Internet for yourself!
To do this, you'll need the following:
- a modem (the general rule is to buy the fastest one you can afford,
but you'll only be able to use external modems)
- a TCP stack such as Miami, AmiTCP, Genesis or Termite TCP
(if you're using Miami, we recommend the Miami SSL module)
- an SSL-capable browser such as IBrowse or Voyager NG
Please ensure that you are using registered versions of any shareware
software mentioned here. Although in many cases, unregistered versions
may work with the procedures outlined below, we strongly recommend that
you register. After all, you are getting Internet access for free!
This guide favours Miami, but the procedure for other software ought to
be fairly similar. In an attempt to make things slightly easier, we
have provided a Miami configuration file which should prove useful for
setting up your account. You can download it from here.
If you're not using Miami, or simply want to know what goes on, the
following details are contained inside the file:
| Phone Number: | 0845 0796 699 |
| DNS: | 194.152.64.35 |
| 194.152.64.34 |
| 194.152.64.68 |
| Login: | freeservesignup |
| Password: | signup |
| Get DNS From IPCP: | no |
| Verify DNS: | no |
| IP type: | Dynamic |
| Protocol: | PPP |
It should simply be a matter of loading up Miami, loading the
configuration, and then clicking "Online". Once you're connected, load
up your web browser. Ensure that your web browser has the proxies
switched off (in IBrowse, you uncheck the "Use proxy" in the
"Preferences" menu and in Voyager NT, you check "disable proxies" in
the "Settings" menu). In IBrowse, you have the choice of SSL module.
For the best results, set it to use Miami SSL. This is done by going
into the "Network..." configuration from the "Preferences" menu,
selecting the "Security" tab at the top and then setting the SSL module
to "Miami SSL".
Now enter the following URL:
https://signup.freeserve.net/
Note that it's "https" not "http" (https is a secure system that will
ensure that any personal details you enter cannot be intercepted during
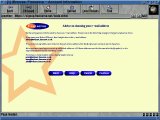
transmission). If it connects correctly, then you should get a page
that looks a little like this:

From here, click "Create a new account" and you'll be taken to the
following page which contains terms and conditions.

Read them thoroughly and if you accept, click "Accept" to get to the
next page. This will give you a page like this where you have to enter
all your details:

Take care when filling in the boxes. Many of them are compulsory, and if
you fail to fill them in, it'll take you back to that page. If you've
provided enough information, you'll be taken to the next page:
On this screen, you'll get a brief explanation of what you'll need to do
in order to select a name for your account together with an E-Mail
address. Click "Continue" to actually do it...

On this screen, you'd enter the first part of the E-Mail address (ie.
that before the "@" symbol) in the first box, followed by the name you'd
actually like to give your account (your "sub-domain"). In our case, we'd
put "webmaster" in the first box and "amigasoc" in the second. In the
next two boxes, you'd enter your choice of password (twice, just to make
sure). Because your web browser is performing the entire procedure across
an SSL connection, you don't need to worry about your password or address
details being intercepted when you submit them.
Finally, you will be given a screen with a button labelled "Finished".
You don't really need to click it as all it does is download a
configuration file for use with Internet Explorer on the PC.

You can now go off-line. Now go back to Miami and enter the "Dialer"
screen. Change the "Login ID" box from "freeservesignup" to whatever you
entered for your sub-domain, but with ".freeserve.co.uk" after it. In
the above example, we'd be using "amigasoc.freeserve.co.uk". Enter the
password you chose earlier into the "Password" box, and you should be
ready to go!

There are a few other things that you'll find useful now that you have a
Freeserve account. Firstly, to make your web browsing a bit faster, you
can set up a proxy. To do this in IBrowse, go into the "Network..."
section of the "Preferences" menu and select the "Proxy" tab. In
Voyager, go to "General settings..." from the "Settings" menu and go to
the "Net" screen. In either browser, enter the following address into
both the HTTP and FTP server boxes:
www-cache.freeserve.net
...and 8080 into the corresponding boxes for the "Port". When you're
using Voyager, make sure that each of the "Use" check boxes are
activated. Once you've closed this window, you'll also need to make sure
that the "disable proxies" option from the "Settings" menu is unchecked.
In IBrowse, you'd check "Use proxy" in the "Preferences" menu to make
sure that the proxy is actually used.
To set your E-Mail client to pick up mail from your Freeserve account,
you'd have to set three things:
Your E-Mail address which should be of the form:
webmaster@amigasoc.freeserve.co.uk
...the Freeserve POP3 Server which is:
pop.freeserve.net
...and SMTP Server:
smtp.freeserve.net
In YAM, you'd first go to the "First steps" screen from the
"Configuration..." from the "Settings" menu and fill in the boxes for
your E-Mail address, and the POP server. The password is the same as the
one you set when you signed up. It should all look a little like this:
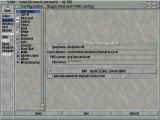
...you'll also need to enter the account details into the "TCP/IP"
screen:

...and that should be all there is to it!
If you're planning on using a news reader to visit Usenet news groups,
then you'll need to set your NNTP server to this:
news.freeserve.net
Finally, if you'd like to make use of the five megabytes worth of web space,
then you'd transfer your website to the following address:
uploads.webspace.freeserve.net
...using the same login and password as you supplied when you signed up.
Once you're happy with your new site, you can show it to others by
pointing them to an address of the form:
http://www.amigasoc.freeserve.co.uk/
Our thanks to Robert Gilbert from Kickstart, the Surrey Amiga Users Group for
providing the information for signing up.


